


Editing: My Perspective
- Morgan Davis
- Jul 25, 2017
- 4 min read
Hey everybody! I'm back today with another photography post, because you guys seem to like when I give my perspective on this topic. For this post, I wanted to focus less on the actual taking of photos and more on the post-production phase: editing. An Instagram filter alone simply won't do! Many beginning photographers don't realize how essential this step is, so I wanted to make the perfect post to help even inexperienced photographers master editing, complete with instructional videos!
Firstly, Collect your Photos and Pick a Theme
To begin, you need to sort out the photos you like most from your shoot. Not all of your pictures will be good enough to head into the editing phase, so make sure you choose only the best ones to edit individually. If you want to read about taking professional-looking photos, click here.
Now you need to pick your theme. There are many different examples of theme, but it really revolves around how/where you've shot your photos.
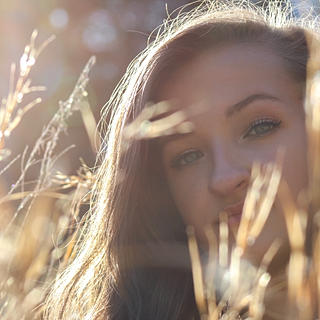
For example, if you shot outdoors with trees or flowers, choose a rustic or dramatic theme. There are a few examples of this below.


If you shot in the cityscape, keep the theme more upbeat and urban (view the examples below).


Whatever location you chose to shoot in, make sure your editing theme compliments the photos taken.
Editing the Photos - Basic
Now let's begin editing the photos. I use Lightroom on my IPhone because it is free to download and sign up on mobile devices. You can also use VSCO or EyeEm, two softwares I have used in the past, but there are many more features on Lightroom that aren't available on the other applications (I will get into the more advanced features later, but for now, I'll focus on the basic tools available).
The video below corresponds with the instructions, showing how to edit photos for beginners. (Sorry it's sideways, my phone is a portrait view and I had to upload it that way).
1. Use light correction to make sure the highlights, shadows, exposure, and contrast are exactly how I want them. Another reason I love Lightroom so much is because turning down the highlights or turning up the shadows won't ruin the overall appearance of the photo, like other softwares do. With the photo below, I
You can toggle between the settings until you find the perfect setting that makes the photos exactly how you want them to look. Just try to even out the highlights and shadows so that everything is balanced, and make sure the exposure isn't too high or too low. You can also turn down contrast to make your picture a little less dramatic, or turn it up to make it stand out more. You don't need to worry about the black and white settings for now.
2. Now let's move to the colors in the photo. You can warm up or cool down photos with the warmth setting. I personally like to warm up my photos very slightly but you might like a more cool-toned theme. If you think your photo looks a little faded, you can turn up the vibrance and saturation and do the opposite if the colors are too bright. Just make sure you toggle back and forth to get the perfect setting.
3. This step is optional, but encouraged if you are editing a dramatic photo (view theme section above to select editing style). Click the effects tab and edit a vignette on. A Vignette is basically the dark circle put around the outer corners of the photo that makes the subject stand out more. You can edit the roundness, feather, midpoint, etc. to make the vignette show the way you like best.

Editing the Photos - Advanced
Now let's move into more advanced editing. This can really help make a difference in the quality of your photos, so if you want to have more professional looking pics, I highly suggest you try these steps.
The video below corresponds with the instructions, showing how to edit advanced photos. (Again, sorry for it being sideways!)
1. Follow the basic instructions above for editing the highlights, shadows, exposure, and contrast.
2. After you have done the basic color settings (like warmth, saturation, vibrance), let's try color correcting. Color correcting is a way to choose a specific color in the photo and edit the hue, saturation, and luminance.
For example, if the subject's face looks too red after the previous edits, select the red color corrector and turn down the saturation and up the luminance a little to make their face less red and give it a natural glow. If the trees in the background are too vibrant, select the green color corrector and turn the hue down to make them more golden and turn the saturation down to make them less vivid. Color correcting is extremely useful if an item in your photo isn't the color you want it to be.
3. Now for the fun part! If you are editing a photo of a person, this step can really add drama and dimension. I use this tool to contour a person's face, even though that's not what it is specifically intended for. I line up circles on certain spots of the face that I want to stand out and turn up the exposure. This may include: middle of forehead, tip of nose, bridge of nose, cheekbones, corner of eye, brow bone, etc.
Then I line up circles on certain spots of the face that I want to contour, and turn down the exposure and turn up the warmth. This includes: Outer edges of forehead, edges of nose, directly under the cheekbones, etc.
4. Finish up by adding a vignette if you have a dramatic photo.

And that's it! I hope you guys enjoyed this post, I had a lot of fun writing it! Let me know if you want to see more photography posts in the future like this one!
Comments